Introduction
Tutorials
Getting familiar with GeoData Manager
Changing how GeoData Manager looks
Scenarios for using GeoData Manager
Data types and nodes
Help with data types and nodes

Getting familiar with GeoData Manager
Changing how GeoData Manager looks
Scenarios for using GeoData Manager
Help with data types and nodes
Do not plug the dongle into your computer until you are told to.
There two parts to these instructions: part 1 covers installing a dongle on the server and part 2 covers installing one or more dongles on a client computer.
Install12062022.exeDownload these dongle test programs in case you need them for troubleshooting:
Download the network dongle verification program VerifyNetworkKey_GDM.exe
Download the network dongle monitor program program NetKeyMonitor_GDM.exe
Select a network computer to be the dongle server. This computer must be accessible to all clients computers that will run GeoData Manager. Usually the dongle server is the computer that holds GeoData Manager's databases.
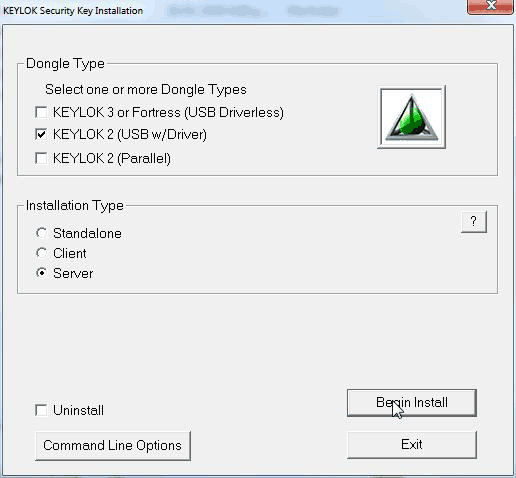
Run the KEYLOK installation program Install12062022.exe on the dongle server computer. You should see:

Select KEYLOK 2 (USB with driver) and Server. Click Begin Install; you should see:

If you do not see this, it is likely that drivers have already been installed. In this case, go to the Windows control panel and uninstall the drivers; then start this again.
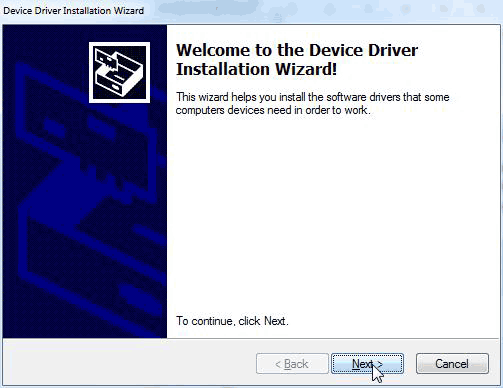
Then the Device Driver Installation Wizard is displayed:

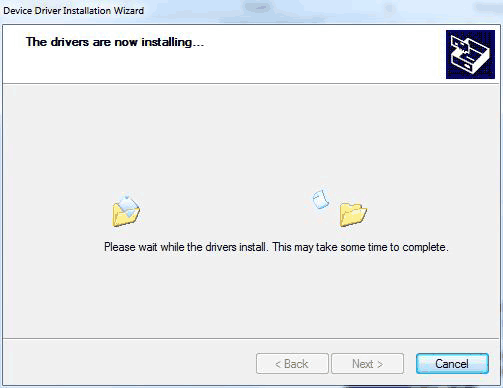
Click Next. The device drivers are installed and you might see this.

Then the Wizard is displayed again.When this screen closes, click Finish in the Wizard screen to complete the installation.
Click Finish. You should see:

Do not click Close yet. Plug the dongle to a USB port on your dongle server computer. Still do not click Close. Wait for a few seconds as the device drivers are installed; you may see this notification:

Once the drivers have been installed, now click Close.
On each of the other network computers (dongle client computers):
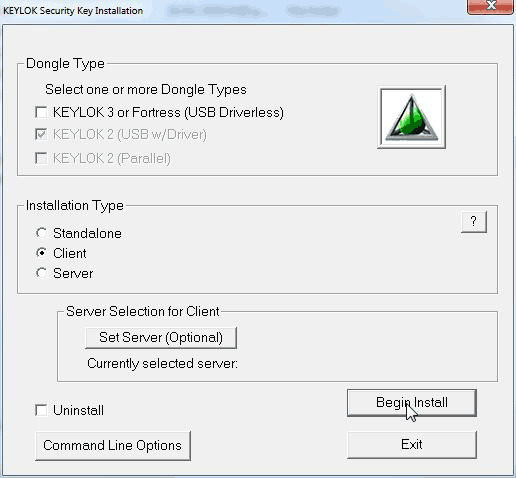
Run Install.exe on the client computer. You should see:

Select KEYLOK 2 (USB w/Driver) and Client. Click Begin Install; you should see:

Click Close to complete the installation on that computer.
Be sure you can ping from the client to the server
For example, from a Command Prompt:
ping _servername_ or ping _IP Address_ If pinging fails, all communications may be disabled between the client and server. Ensure there is a Trusted Zone defined in the firewall settings for the connection between the KEYLOK client and the server.
Configure security settings
For TCP/IP networking there needs to be a clear TCP/IP connection between the client and the server. The port used for communication is 4242 and must be open. Firewalls and security software must be set to allow klserver.exe and the protected application to communicate.
Is the TCP/IP dongle server klserver.exe installed and running?
Check to make sure that klserver.exe is installed in \Windows\System32 (32-bit OS) or \Windows\SysWow64 (64-bit OS) and that it is running as an automatic service.
You can check to make sure that klserver is running by going to a command prompt, typing net start klserver and pressing Return. The system should respond that the klserver service has already been started. If you get a response that the klserver service has been started successfully, go to Control Panel > Administrative Tools > Services and make sure that klserver is listed and that it is set to automatic to make sure that it starts each time the machine is booted.
Subnet
Please note that it is strongly recommended on a TCP/IP network that the 'subnet mask' be set the same for both the server and clients. Network 'properties' can be used to acquire the subnet mask.
Run NetKeyMonitor
NetKeyMonitor_GDM.exe (download above) checks that the computer can see the dongle and how many users the dangle allows.
Run VerifyNetworkKey
VerifyNetworkKey.exe (download above) checks that an application can communicate with the dongle.
If the dongle is not found, you may have an out-of-date KEYLOK install program (Install.exe). Download the latest install program and check that you have installed the latest version, If not:
If the dongle is found on the server, run VerifyNetworkKey on a client machine. If the dongle is not found from the client machine, then your KEYLOK interface file might be out of date. The interface file (KL2DLL32.DLL or NWKL2_32.DLL) used to interface with the KEYLOK API is not in sync with the driver. In this case, please contact us: software@gsds.co.nz.